
Learn how to use the automator on Mac and all of those cumbersome jobs can be eradicated in a flash!
When you purchase through links on our site, we may earn an affiliate commission. Here’s how it works.

If you've ever wondered how to use the Automator on Mac, then we can assume one thing: you've actually spotted the Automator app on your computer. We'd hazard a guess that most Mac users — including those who have used computers such as the MacBook Pro for many years — don't even know that it is built into macOS.
But there it is, with its cute robot icon waiting, almost begging, to be used. The idea is that it helps you to make light work of repetitive or menial tasks such as batch renaming multiple files, mass quitting apps, keeping a download folder clean or converting images. It does so by letting you create workflows that can be as simple or as complex as you like.
To aid you, Automator comes with loads of actions and, in many ways, the first step towards mastering this app is to read through everything it does. It can take a little while to get your head around all of the things it can do, but if you think of it like some basic “if this then that'' programming, plus some dragging and dropping, then you're halfway to cracking it. Try it and you'll see what we mean.
Here's how to use the Automator on Mac.
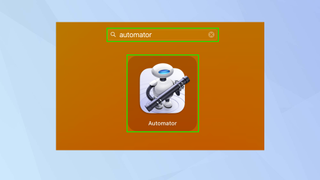
Press Cmd + Space to open Spotlight Search, type "Automator" and click the icon. You can also open Launchpad from the Dock and find the app there.
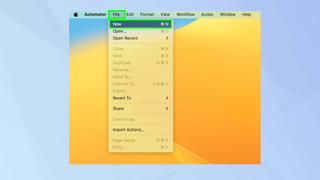
In this example, we are going to create a workflow that will batch convert and resize images but there are other things you can do. To get started, click File and select New.
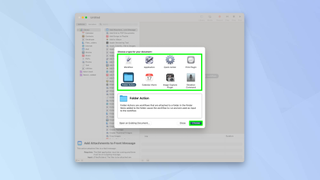
Now, you will see eight different types of workflows. It can feel overwhelming but let's take a look at what each one does.
Workflow: This will allow you to create a workflow that can be run from within the Automator app. As this suggests, you'd need to launch Automator to make use of it.
Application: This is the one to choose if you'd rather have a standalone app for your workflow.The app will run when you open it and you'll be able to drop files or folder into it.
Quick Action: Want your workflow to be at your fingertips? Select this and you can add a workflow to Finder windows, the Services menu and Touch Bar.
Print Plugin: You can create workflows that are related to printing documents. This kind of workflow places will be run from the print dialogue. You could save printed PDFs to a folder, for example.
Folder Action: This creates a workflow that is linked to a specific folder in Finder. The workflow will trigger when the contents of a folder changes. For example, an image could be automatically watermarked by dropping it in the folder.
Calendar Alarm: By tying a workflow to the calendar, you can ensure a task is performed when a specific event takes place.
Image Capture Plugin: This workflow is connected to Image Capture – a Mac app that lets you transfer photos and videos to a Mac from a camera device.
Dictation Command: Finally, this workflow would run when triggered by dictation – the accessibility feature which allows you to control your Mac using your voice.
Simply select the type of workflow you want to make use of and click Choose. We have chosen Folder Action.
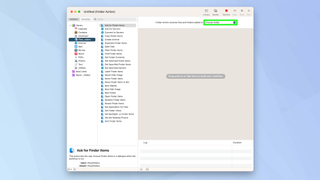
Since we've selected Folder Action, a folder needs to be selected. Click Choose Folder at the top of the window, select Other and create one.
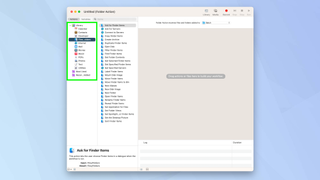
Now look down the first column — click to expand the Library if necessary.
You need to choose an input category. In our case, we are selecting Files and Folders because we want to create a folder that we drop images into.
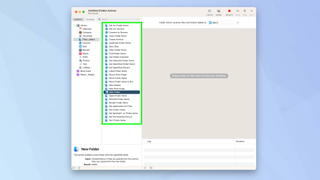
Now select an action from the next column. Drag it to the workflow window to the right. In our case, we want to start with a new folder.
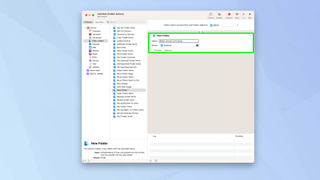
Adjust the parameters of your action. Here, we want to give our new folder a name and determine where it should go (the Desktop).
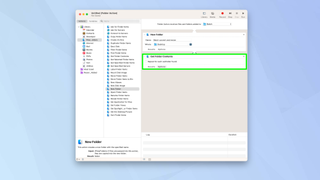
The idea is to build more actions to create a workflow. Drag the next action from the left to below the first action. We've chosen Get Folder Contents.
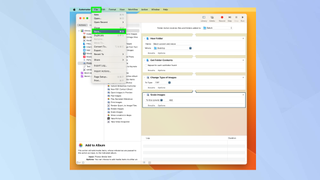
When a workflow is complete, click File and select Save. In our example, a folder will be placed on the Desktop.
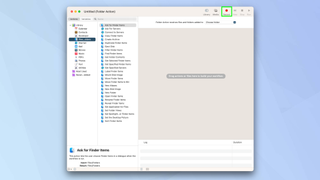
You are not limited to the functions suggested within Automator. You can also create your own. One of the most flexible ways of doing this is to hit record in the top right of the screen instead of searching for a particular in-built action.
After hitting record, you then need to perform some actions, for example, clicking on a sequence of buttons. When you stop recording, that task will be converted into an action that you can use.
We created a Folder Action and that has placed a folder on the Desktop. In this case, all you will need to do is identify images that you want to batch convert and drag and drop them into that folder.
Here at Tom’s Guide our expert editors are committed to bringing you the best news, reviews and guides to help you stay informed and ahead of the curve!
By submitting your information you agree to the Terms & Conditions and Privacy Policy and are aged 16 or over.
So let's see what takes place to give you a better understanding of how the workflow example above works.
1. In Step 4 above, you created a folder . This is the one that appeared on your Desktop – the one that allowed files to be dropped in for batch conversion.
2. When an image is dropped into the folder, it's instantly converted into specific file format and scaled the way you specified.
3. Since you told the workflow that you wanted a new folder to be created called Batch Convert and Resize (at least, that's what we called it), any files dropped into the original folder end up in this new folder.
And there you go. You should now have a solid idea of how to use the Automator on Mac but, of course, we've only covered one kind of workflow. Your next step is to experiment and see what else can be done so play around and explore the options. As you will see, it's a powerful tool. Even so, it's not the only one. Why not take a more in-depth look at how to use macOS or learn useful tricks such as how to show the hidden files in Mac, or how to clear the cache on Mac? You can also take your computing to the next level by checking out 9 MacBook Pro tips everyone needs to know. If you're new to macOS and need some basic tutorials, get started with how to type a hashtag on Mac.